Creating a Keyboard Input Accessory View
August 10th, 2018
Filed under: iOS Development | Be the first to comment!
In this article you’ll learn about keyboard input accessory views and how to add them to your iOS app to make text editing smoother.
Adding a keyboard input accessory view isn’t too difficult. Add a new xib file to your project for the view. Load the view from the xib file. Set the input accessory view to the view you loaded. There’s less than 10 lines of code involved.
What Is a Keyboard Input Accessory View?
A keyboard input accessory view is a view that appears above the iOS onscreen keyboard. The default iOS behavior is to have no input accessory view, but nothing is stopping you from adding one. A common use of an input accessory view is to show a toolbar with frequently used commands when typing text. The writing app Ulysses uses an input accessory view to insert Markdown characters into the text. If you were writing an iOS HTML editor, you could show a toolbar with buttons to insert the most common HTML tags.
Keep in mind that a keyboard input accessory view has type UIView?, which means the accessory view can be any kind of view. The accessory view does not have to be a toolbar. I’m using a toolbar as an example in this article because many apps have a toolbar as the accessory view.
Step 1: Create a Xib File for the Accessory View
The first step in creating a keyboard input accessory view is to create a new xib file and add it to your project. In Xcode choose File > New > File to add a new file to your project. The xib file templates are in the User Interface section under iOS.

The empty xib file is the best option for toolbars. If you want a custom view for the accessory view, you can choose View instead of Empty.
Step 2: Add the Accessory View to the Xib File
Take a toolbar (or whatever kind of view you want to use) from the object library and drag it to the canvas. The toolbar has one item in it. Add bar button items to the toolbar to fill the toolbar.
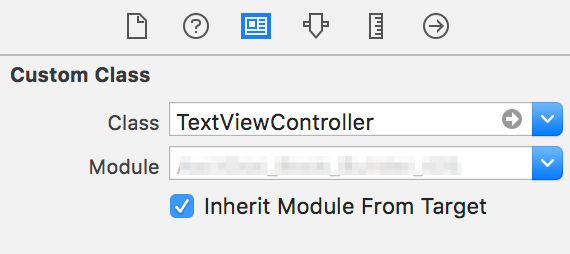
While you’re in Interface Builder go to the identity inspector and set the class for the File’s Owner object in the xib file.

Set the class to the view controller where you’re going to use the input accessory view. By setting the File’s Owner class to the view controller, you will be able to connect the controls in the input accessory view to IBActions in the view controller to respond to tapping the controls. In the xib file make a connection from the controls to File’s Owner to connect to IBActions.
Step 3: Load the Accessory View from the Xib File
Now it’s time to write some code to load the input accessory view. Call the Bundle class’s loadNibNamed function to load a xib file from the app bundle. Supply the name of the xib file as the first argument. Pass self as the owner argument, and pass nil as the options argument.
Calling loadNibNamed returns an array of the top level objects in the xib file. The input accessory view is the only top level object in the xib file you created so accessing the view is easy. Use the first property to access the first item in the array and grab the accessory view. The last code to write is to set the text view’s input accessory view to the view you loaded from the xib file. The following function sets up an input accessory view for a toolbar:
func setupInputAccessoryView() {
    let nibContents = Bundle.main.loadNibNamed("KeyboardInputAccessoryView",
        owner: self, options: nil)
    if let toolbar = nibContents?.first as? UIToolbar {
        textView.inputAccessoryView = toolbar
    }
}
Conclusion
There’s no more code to write. If you build your project and show the keyboard, the toolbar will appear at the top of the keyboard.
I noticed a bug in the iOS 11 Simulator where the toolbar would stay at the bottom of the screen after dismissing the keyboard. I did not run into this issue on iOS devices. If the toolbar is not going away, set the isHidden property of the input accessory view to true when dismissing the keyboard. Set isHidden to false when showing the keyboard.